Compile VTK 8.2.0 with Visual Studio 2019
The Visualization Toolkit (VTK) is the 3D engine behind many scientific visualization applications, such as MayaVi, the popular scientific data visualizer for Python. It is also the cornerstone of several advanced 3D-enabled biomedical applications, such as ParaView and 3D Slicer.
Perhaps lesser known, VTK provides a built-in high performance DICOM parser, because of its deep roots within the biomedical community. For my own clinical project, I have recently started learning and using VTK. I found its learning curve to be somewhat steep for a beginner, mostly due to the scarcity of up-to-date tutorials. These are my notes on compiling VTK 8.2.0 from source under Windows 10 after trial-and-error and copious amount of googling, for future reference; I hope they can help you save some time, if you happen to be in the same shoes.
How to obtain VTK?
VTK is written in C++. The easiest approach that I found to obtain pre-compiled binaries is through PyPI. VTK wheels for all major platforms are available. On Windows, pip downloads pre-compiled DLLs into the “site-packages\vtk” directory of your Python distribution.
> pip install vtk
You can call methods within these DLLs through the Python bindings.
import vtk
The Python bindings expose the VTK function signatures, but there are no equivalent C/C++ header files in this PIP-installed VTK directory. To build against VTK using C++, it’s better to compile directly from source code, which is available at vtk.org under BSD license.
Where to find the most up-to-date compiling/building guide?
VTK is under active development by Kitware, Inc. This means that if you google “compile vtk” like I did, you will likely end up with obsolete tutorials. In fact, by the time you saw this blog post, it has probably become outdated in many ways.
I found that the best guide for building the latest release is directly hosted on VTK’s development GitLab repository: build_windows_vs.md. I assume this document gets the maintainers’ first attention whenever something is changed between releases.
In addition, the VTK Wiki contains lots of useful information. There is also the VTK Mailing List if you’d like to reach out to the VTK community directly.
Prerequisites
Chocolatey to help manage packages.
CMake
> choco install cmakeDownload and install Visual Studio. This is for the Microsoft Visual C++ compilers, so be sure to select them during installation.
Generate Visual Studio project using CMake
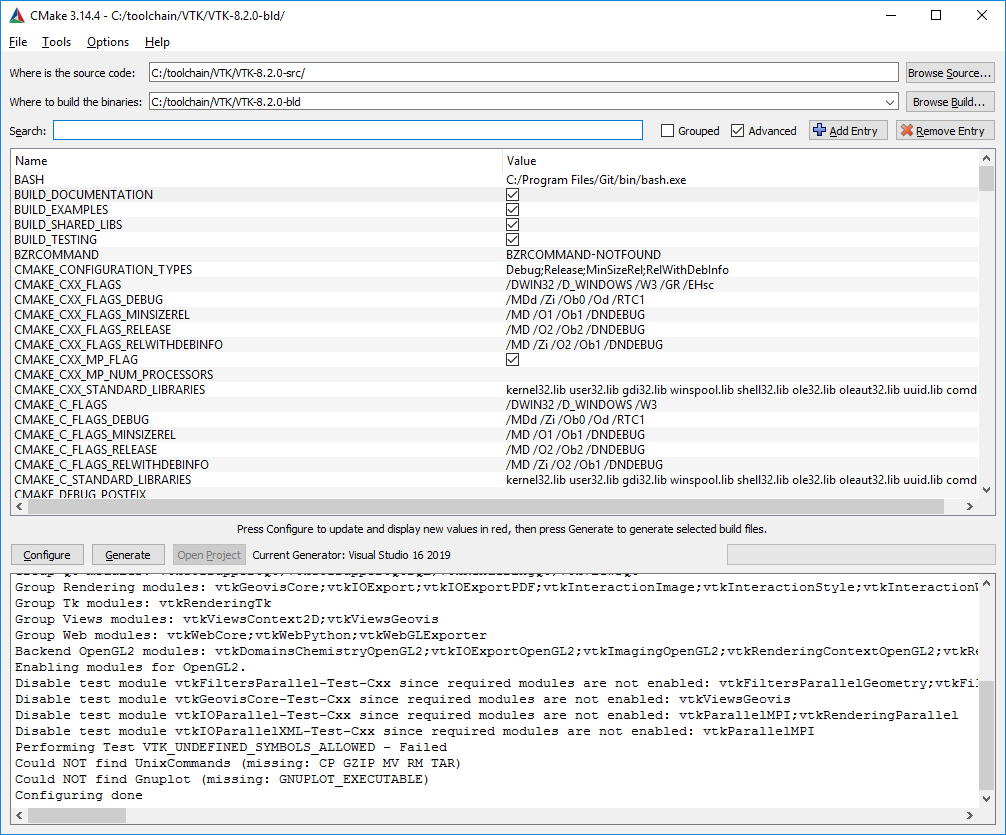
I put all of my dev tools under the same directory (C:\toolchain). Extract VTK code source to “C:/toolchain/VTK/VTK-8.2.0-src”. Set the “Where to build the binaries” blank to “C:/toolchain/VTK/VTK-8.2.0-bld”. It is preferable to put the build directory outside the source directory.
Click “Configure” to have CMake sort out the compilation variables. CMake will first prompt you to choose the generator.

Compilation variables
CMAKE_INSTALL_PREFIX: This is rather important, as it sets the installation path of your compiled binaries. I changed the default path to a non-privileged location (C:/toolchain/VTK/VTK-8.2.0) so as to avoid dealing with permissions. While it is okay not to “install” VTK after building it - you can simply reference the build directory - the installation process extracts the “essence” of the built VTK files (.h, .lib, .dll, etc.) into an independent directory, and modifies the system environment variables for your convenience.
BUILD_SHARED_LIBS: Check to build DLLs. Otherwise, only static libraries (.lib) will be generated.
CMAKE_CXX_MP_FLAG: Check to support multi-core processors.
BUILD_TESTING: Check to build testing cases.
BUILD_EXAMPLES: Check to build examples.
BUILD_DOCUMENTATION: Check to build documentation.
If you are building VTK for use with Java, Python, MFC or Qt, you will need to check relevant compilation variables. I do not need those, so I skipped them.
BUILD_DOCUMENTATION is not really necessary, because it’s available for download (vtkDocHtml). It takes a long time to build the documentation and needs extra dev packages to support the compilation. I was mainly curious to see if there are any differences between my build vs the downloaded one.
Several tutorials that I read recommend unchecking BUILD_TESTING, BUILD_EXAMPLES to save compilation time, because these examples tend to take even more time to compile than the core part of the VTK library. I figured that sample codes can be tremendously helpful for a beginner, so I decided to build them anyway.
For building these extra parts, you will need additional packages:
For building documentation
Perl
> choco install strawberryperlGraphviz. This package contains the dot executable required by Doxygen.
> choco install graphviz
For building testing
- VTKData and VTKLargeData. These are data and baseline images for VTK regression testing and other VTK examples. In principle, these two data sets should have been put together. They are separated into two batches because of long cvs checkout times. If you wish to test on VTKLargeData, you will need to check the VTK_USE_LARGE_DATA variable in CMake.
VTKData
Older tutorials instructed me to set the VTK_DATA_ROOT for building examples. This variable is nowhere to be found in the current release. As it turns out, the VTK maintainers made some changes to the structure of the test data. You will now only need to extract the “.ExternalData” folder directly into the source directory (C:/toolchain/VTK/VTK-8.2.0-src/.ExternalData) and CMake will automatically download everything.
On Tuesday, September 12, 2017 9:32 AM, David E DeMarle
wrote :We changed the structure of regression test data in 6.1 to allow developers to make proposed changes to code and data concurrently and ensure that the continuous integration test machines do not fail when they run new tests on old data. The net result is that a VTK build tree has test data files that are actually symbolic links to the md5 files which live elsewhere. You can generally open and use the symbolic links exactly as you would a normal data file. If you turn on testing in your build, cmake will try to download each one of the files. Alternatively you can untar the source and data packages for a release in the same directory and the default build setup will use them and avoid downloading anything else.
Compiling
Click “Configure” every time you change any variables. It may take a few times. Correct all errors and make sure there are no reds, as seen below:
Then click “Generate” to create the Visual Studio solution file, and then click “Open Project”. This will launch Visual Studio. Set the Build Configuration to “RelWithDebInfo”.

Build (“Build –> Build Solution”) the ALL_BUILD project first, which is the default when Visual Studio is launched.
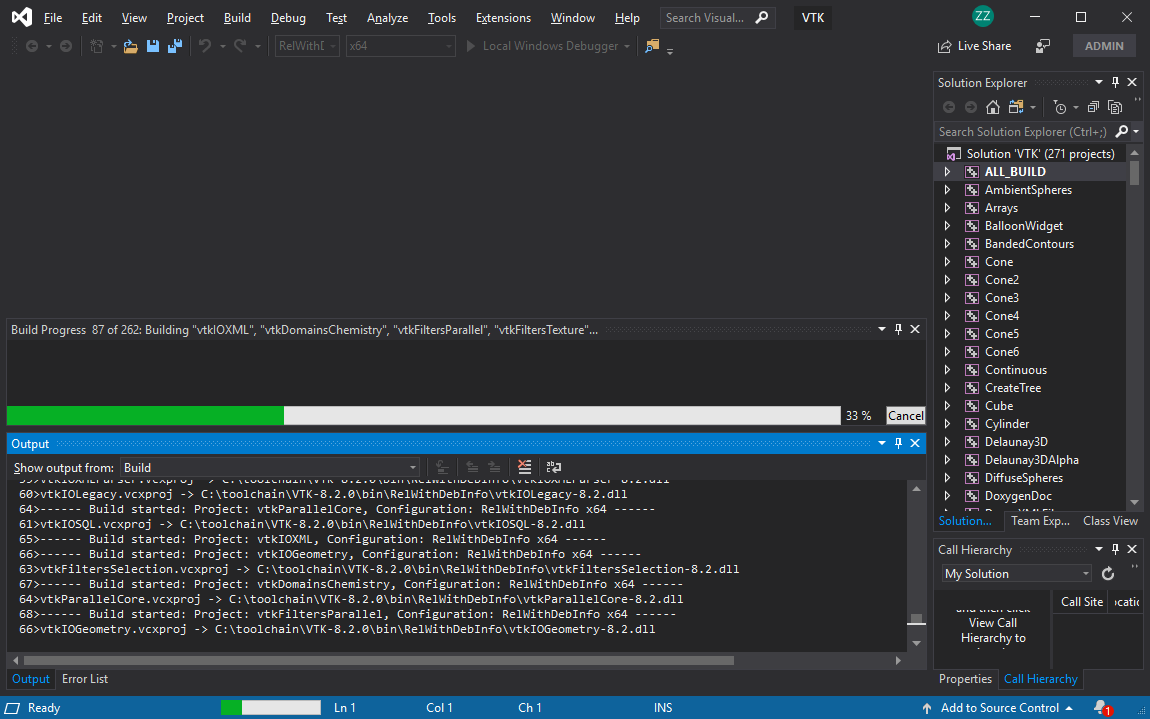 This may take a while. The compiled DLLs will be located in “C:\toolchain\VTK\VTK-8.2.0-bld\bin\RelWithDebInfo\“.
Build the INSTALL project. This installs VTK into the directory as set in the CMAKE_INSTALL_PREFIX CMake variable.